

How to Install a Well Water Filtration System (Complete DIY Guide)
Well Water Installation Guides
How to Install a Well Water Filtration System (Complete DIY Guide)
Every water treatment system MAW sells was designed for homeowner installation. After 32 years of doing installs myself, here is the honest truth: some systems take 30 minutes and basic tools. Others need a full afternoon and real plumbing skill. This guide covers every system type, tells you exactly what each one requires, and lets you decide which jobs to tackle yourself and which ones to hand off to a plumber.
New to well water treatment? Start with our Complete Guide to Well Water Filtration Systems to understand what you need before you install. First-time well water homeowners should also see our new homeowner's guide for a step-by-step walkthrough from water testing to system selection.
By Aidan Walsh, Water Treatment Specialist • 32 years of field experience • Updated March 2026
TL;DR: Installation at a Glance
Most MAW water treatment systems can be installed by a handy homeowner in 2 to 4 hours. Here is what to know:
- Easiest installs: Sediment filters (wall-mount housing, no drain, no electric) and non-backwashing acid neutralizers (upflow tank, no drain, no electric).
- Moderate installs: Backwashing acid neutralizers, iron filters, and carbon filters. These need a drain line for backwash and a standard 120V outlet.
- Most involved installs: Water softeners (drain line, brine tank, salt, programming) and multi-system setups. Still very doable if you plan the layout first.
- Plumbing options: CPVC with solvent cement is cheapest. PEX with SharkBite fittings is easiest. Both work great.
- All MAW systems ship with the bypass valve, media (pre-loaded or bagged), Vortech tank, service funnel, and 1-inch male threaded connections. You supply the pipe, fittings, and basic tools.
- Free tech support: Call Aidan at 800-460-5810 during your install. He has walked thousands of homeowners through the process in real time.
Installation Difficulty Assessment
Answer 3 quick questions to find out if you should DIY or call a plumber.
Before You Start: Tools and Materials
Every MAW system ships with the tank, valve head, bypass valve, media (bagged or pre-loaded), service funnel, and 1-inch male threaded connections. You provide the plumbing to tie it into your home's water line.
Tools You Will Need
- Pipe cutter (for copper, PEX, or CPVC depending on your piping)
- Channel-lock pliers or large adjustable wrench
- Screwdriver (flat and Phillips)
- Teflon tape (use on all threaded connections)
- Bucket and towels (there will be some water spillage)
- Level (for making sure tanks are plumb)
- Tape measure
- Marker or pencil for marking cut lines
Plumbing Supplies to Buy
- Pipe in your chosen material (CPVC or PEX, enough to reach from your pressure tank to the treatment system and back)
- Fittings: adapters from 1-inch to your pipe size (most homes use 3/4-inch or 1-inch)
- SharkBite push-fit connectors (optional but make the job much faster)
- Solvent cement and primer if using CPVC
- Crimp rings and tool if using PEX (or use SharkBite instead)
- Ball valve or gate valve for a main shutoff if you do not already have one
- For backwashing systems: 1/2-inch drain line tubing and fittings
Pick up everything at Home Depot or Lowe's before you start. Running to the store mid-install with your water shut off is no fun.
Before Cutting Any Pipe
Shut off the water supply at your well pressure tank (or the valve just after it) and open a cold water faucet to relieve pressure. Have a bucket ready. Even after draining, some water will come out when you cut. This is normal.
Planning Your Installation
Good planning is the difference between a smooth 2-hour install and a frustrating all-day project. Before you touch any pipe, answer these four questions.
1. Where does the system go?
Every water treatment system installs after your well pressure tank and before your home's plumbing. This means all the water entering your house passes through the treatment first. The ideal location is in your basement, utility room, or crawl space, as close to the pressure tank as practical.
You need enough space for the tank (13 to 54 inches tall depending on the model) plus room to access the valve head on top for maintenance. Leave at least 12 inches of clearance above the tank.
2. Do you need a drain?
Backwashing systems (iron filters, water softeners, backwashing acid neutralizers, and backwashing carbon filters) need a drain for their cleaning cycle. The backwash discharge runs through a 1/2-inch line to a floor drain, laundry tub, washing machine standpipe, sump pump, or outdoor discharge (warm climates only).
Non-backwashing systems and sediment filters do not need a drain. Backwashing vs. non-backwashing acid neutralizers explains the differences in detail.
3. Do you need electricity?
Backwashing systems need a standard 120V outlet within cord reach of the valve head (typically 6 to 8 feet). Non-backwashing systems and sediment filters need no electricity at all. UV systems need a dedicated outlet near the UV chamber.
4. What pipe material are you working with?
Look at your existing plumbing. Most well homes have copper, PEX (flexible plastic with crimp rings), or CPVC (rigid plastic). Your new plumbing does not have to match what is already there. SharkBite push-fit connectors let you transition between any pipe type without soldering or gluing.
Plumbing Options: Copper, PEX, and CPVC
You need to connect your treatment system to your home's existing water line. Here are the three common approaches, ranked by ease and cost.
| Pipe Type | Ease of Use | Cost | Best For |
|---|---|---|---|
| PEX with SharkBite fittings | Easiest (push-fit, no tools beyond a cutter) | $$ | First-time DIYers, fast installs |
| CPVC with solvent cement | Easy (cut, prime, glue, hold 30 seconds) | $ | Budget-conscious installs, permanent joints |
| Copper (soldered) | Advanced (requires torch and soldering skill) | $$$ | Matching existing copper, professional installs |
Aidan's Recommendation
After 28 years of doing installations, we found that CPVC with Oatey one-step solvent cement is the cheapest and most reliable for DIY. If you want the absolute easiest path, use PEX with SharkBite push-fit connectors. SharkBite fittings cost a bit more but require zero special skills. You push the pipe in and it seals. Done.
One popular hybrid approach from our customers: use SharkBite connectors to tie into your existing plumbing, then run CPVC to and from the treatment system. Best of both worlds.
All MAW systems have 1-inch male threaded connections on the bypass valve. If your home plumbing is 3/4-inch (which most homes are), you will need a 1-inch to 3/4-inch reducing bushing. These are standard fittings available at any hardware store or plumbing supply house.
Installing the Bypass Valve
The bypass valve is the connection point between your plumbing and the treatment system. Every MAW system ships with one, and every system installs the same way at this stage.
What the bypass does
When open (service position), water flows through the treatment tank. When closed (bypass position), water skips the tank and goes directly to your house. You use the bypass whenever you need to service the system, replace media, or temporarily take the system offline without losing water to your home.
Two types of bypass valves
- Stainless steel lever bypass (Fleck valves): Found on all iron filters and 2510SXT water softeners. Lever-actuated. Turn the levers to switch between service and bypass.
- Noryl (engineered plastic) bypass (Clack valves): Found on acid neutralizers and some softeners. Has two knobs with red arrows. When the arrows point toward each other, the system is in bypass. When they point away, water flows through the tank.
Attach the bypass to the valve head
The bypass clips or threads onto the back of the valve head. Match the inlet and outlet arrows. Inlet (IN) is the side where water enters from your well/pressure tank. Outlet (OUT) is the side that feeds your house.
Connect your plumbing to the bypass
The bypass has 1-inch female threaded connections on both sides. Thread a 1-inch male adapter into each side with Teflon tape. From there, run your pipe (CPVC, PEX, or copper) to the existing plumbing.
Follow the arrows
Every valve head has IN and OUT arrows stamped into it. Water from your pressure tank goes into the IN side. The OUT side feeds your house. Getting this backwards will not damage anything, but the system will not treat the water correctly.
Do Not Overtighten Plastic Fittings
The Clack bypass valve is made of Noryl plastic. Hand-tighten the connections, then give a quarter turn with pliers. Overtightening cracks the fitting. If it leaks, back off and add more Teflon tape rather than cranking harder.
System-by-System Installation
Each system type has its own installation steps beyond the universal plumbing connection above. Here is what is different for each one, from simplest to most involved.
Installation Difficulty by System Type:
Sediment Filter (Big Blue Housing)
Difficulty: Easy • Time: 30 to 60 minutes • Drain needed: No • Electric needed: No
A sediment filter is the simplest system to install. It is a wall-mounted housing that holds a replaceable cartridge. Water passes through the cartridge, which catches sand, silt, and sediment particles before they reach the rest of your system.
Mount the bracket to the wall
Use the included mounting bracket and screws. Mount it at a comfortable height near your pressure tank. Make sure you can reach the housing to change the cartridge (every 3 to 6 months).
Connect inlet and outlet
The housing has 1-inch threaded ports marked IN and OUT. Connect from your pressure tank to IN. Connect OUT to the next system in your treatment chain (or directly to your house plumbing if this is your only system).
Install the cartridge and close the housing
Insert the sediment cartridge into the sump (the bottom cylinder). Thread the sump back onto the cap. Hand-tighten only. Use the included wrench if needed for a snug fit, but do not overtighten.
For help choosing the right cartridge, read our complete sediment filter guide. Pricing starts at $145 for a Rusco spin-down and $165 for a 10-inch Big Blue housing.
Acid Neutralizer
There are two types: non-backwashing (upflow) and backwashing. The installation differs significantly.
Non-Backwashing (Upflow) Acid Neutralizer
Difficulty: Easy • Time: 1.5 to 2.5 hours • Drain needed: No • Electric needed: No
This is one of the most popular systems we sell, and one of the easiest to install. No drain, no electricity, no programming. Water flows up through a bed of calcite media, which dissolves slowly and raises the pH to neutral.
Position the tank
Set the tank near your pressure tank on a level surface. Most basement floors are slightly uneven. Adjust the tank by tapping the bottom edge of the black base boot. The tank is designed to move inside the boot for leveling.
Add the calcite media
Use the fill port on the tank and the included service funnel. Pour in the calcite bags, filling to 10 to 12 inches below the top of the tank. If your pH is very low (below 5.5) and your order includes FloMag (corosex), mix 2 to 3 pounds of FloMag per 50-pound bag of calcite.
Connect the plumbing
Follow the bypass valve installation steps above. Water in from the pressure tank, water out to the house. The 1-inch connections reduce to 3/4-inch if needed.
Slowly pressurize and flush
Open a cold water faucet in the house. Put the bypass in service position. Slowly open the water supply valve about 1/4 turn. Let the tank fill gradually. Once water flows from the faucet, open the supply valve fully and let it run for 10 to 15 minutes to rinse calcite dust.
For the full step-by-step with more detail, see our dedicated acid neutralizer installation guide. Non-backwashing acid neutralizers start at $1,295 for 1.5 cubic feet. See the acid neutralizer cost guide for all sizes and pricing.
Backwashing Acid Neutralizer
Difficulty: Moderate • Time: 2 to 3 hours • Drain needed: Yes • Electric needed: Yes (120V)
Same setup as the non-backwashing version, plus a drain line and electrical connection. The backwashing cycle runs automatically (typically once per week) to clean the media bed and prevent channeling.
In addition to the steps above, you need to:
- Run a 1/2-inch drain line from the valve head to a floor drain, laundry tub, or standpipe (see the drain line routing section below)
- Plug the valve head transformer into a 120V outlet
- Set the current time of day on the valve head
- Program the backwash cycle (typically every 5 to 7 days for acid neutralizers)
Read backwashing vs. non-backwashing acid neutralizer to decide which type you need. Backwashing models start at $1,695.
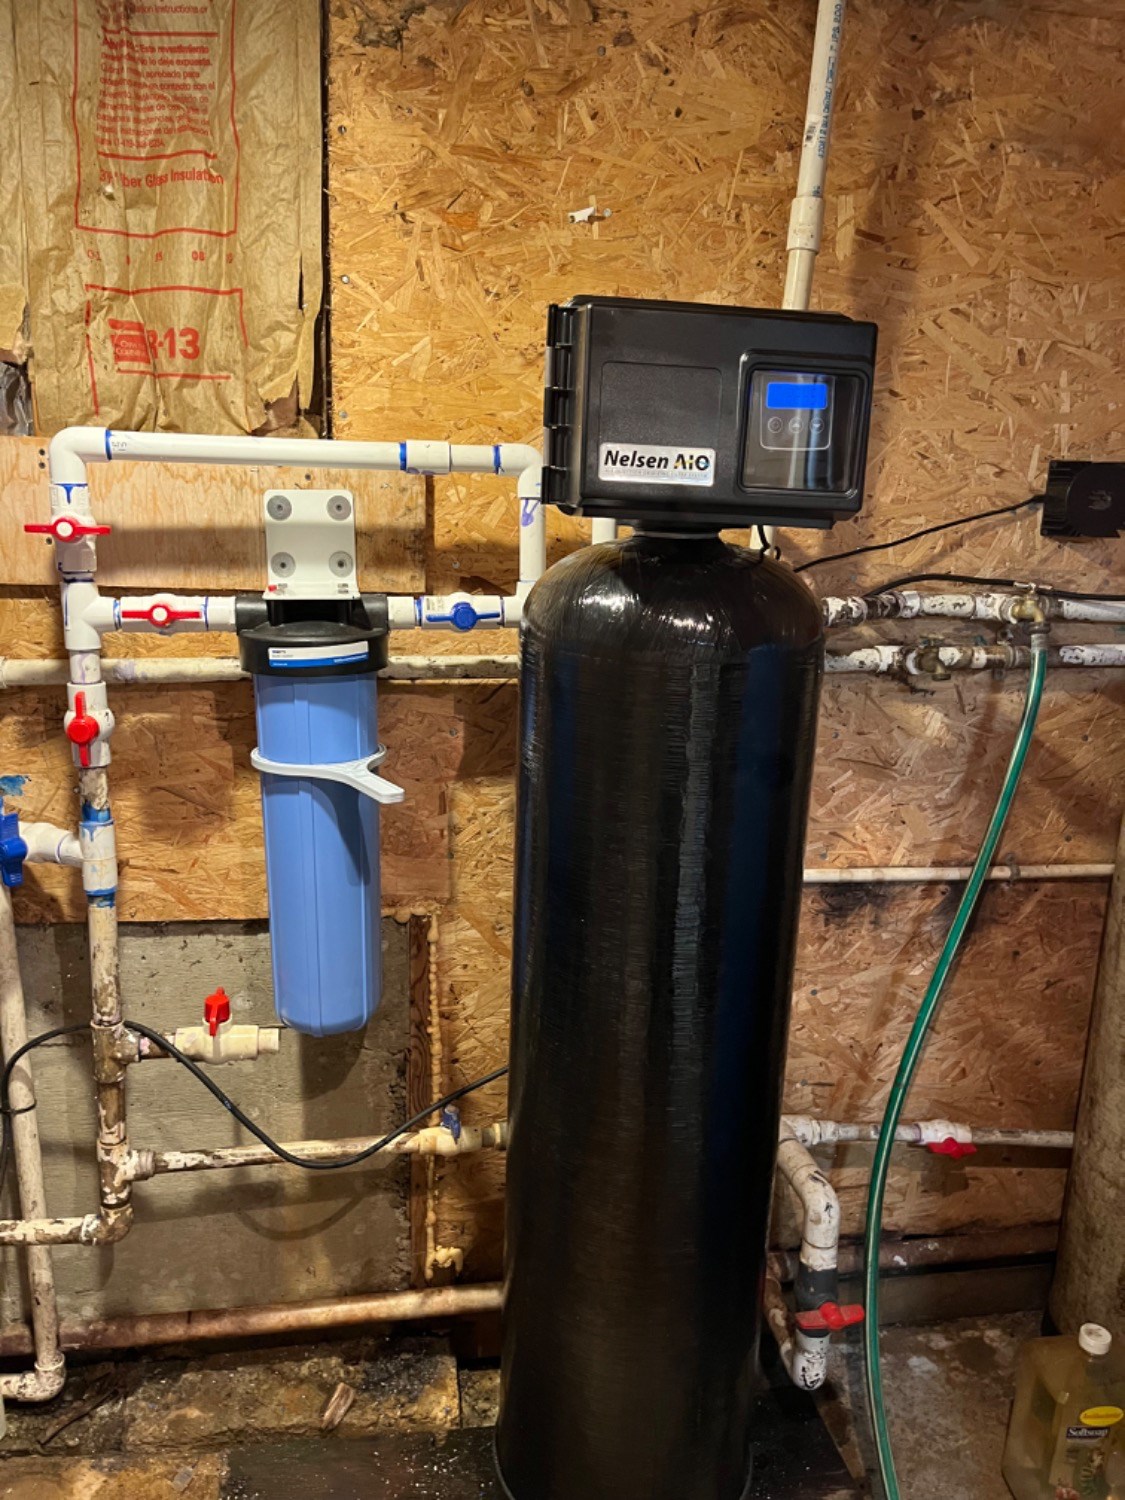
Iron Filter (AIO Air Injection System)
Difficulty: Moderate • Time: 2 to 3 hours • Drain needed: Yes • Electric needed: Yes (120V)
MAW iron filters use the Fleck 2510AIO valve with Katalox Light media in a Vortech tank. "AIO" stands for Air Injection Oxidation: the valve draws air into the tank through a built-in Venturi nozzle, creating an air pocket that oxidizes dissolved iron. During backwash, the iron particles flush out through the drain line.
Position the tank and add media
Set the Vortech tank on a level surface. The Katalox Light media typically ships in bags alongside the tank. Pour the media in through the fill port, leaving 10 to 12 inches of freeboard at the top. The Vortech tank has a built-in distributor plate at the bottom, so there is no gravel underbed to add.
Connect the plumbing (bypass valve)
The Fleck 2510AIO uses a stainless steel bypass valve. Follow the IN/OUT arrows. Connect your piping from the pressure tank to IN, and from OUT to the house.
Run the drain line
Connect 1/2-inch tubing to the drain port on the back of the valve head. Route it to your nearest drain. The backwash discharge is not under high pressure, but it does push water at 2 to 3 gallons per minute during the cycle.
Plug in and program
Plug the transformer into a 120V outlet. Set the current time of day. Set the backwash time (typically 2:00 AM or another time when water is not in use). The AIO system backwashes daily to regenerate the air pocket and flush trapped iron.
For the full step-by-step, see the dedicated iron filter installation guide. For help choosing the right size, read the complete iron filter guide. Systems start at $1,795 for 1.5 cubic feet. Full pricing in the iron filter cost guide.
Carbon Filter
Like acid neutralizers, carbon filters come in non-backwashing and backwashing versions. The installation mirrors the corresponding acid neutralizer type above.
Non-backwashing: No drain, no electric. Fill with carbon media, connect plumbing, flush, and done. Backwashing: Add drain line and electric, program backwash schedule.
Carbon filters treat taste, odor, chlorine, and certain organic compounds. They go after your iron filter and acid neutralizer in the treatment sequence. Read the complete carbon filter guide and compare backwashing vs. non-backwashing carbon filters. Non-backwashing models start at $1,495.
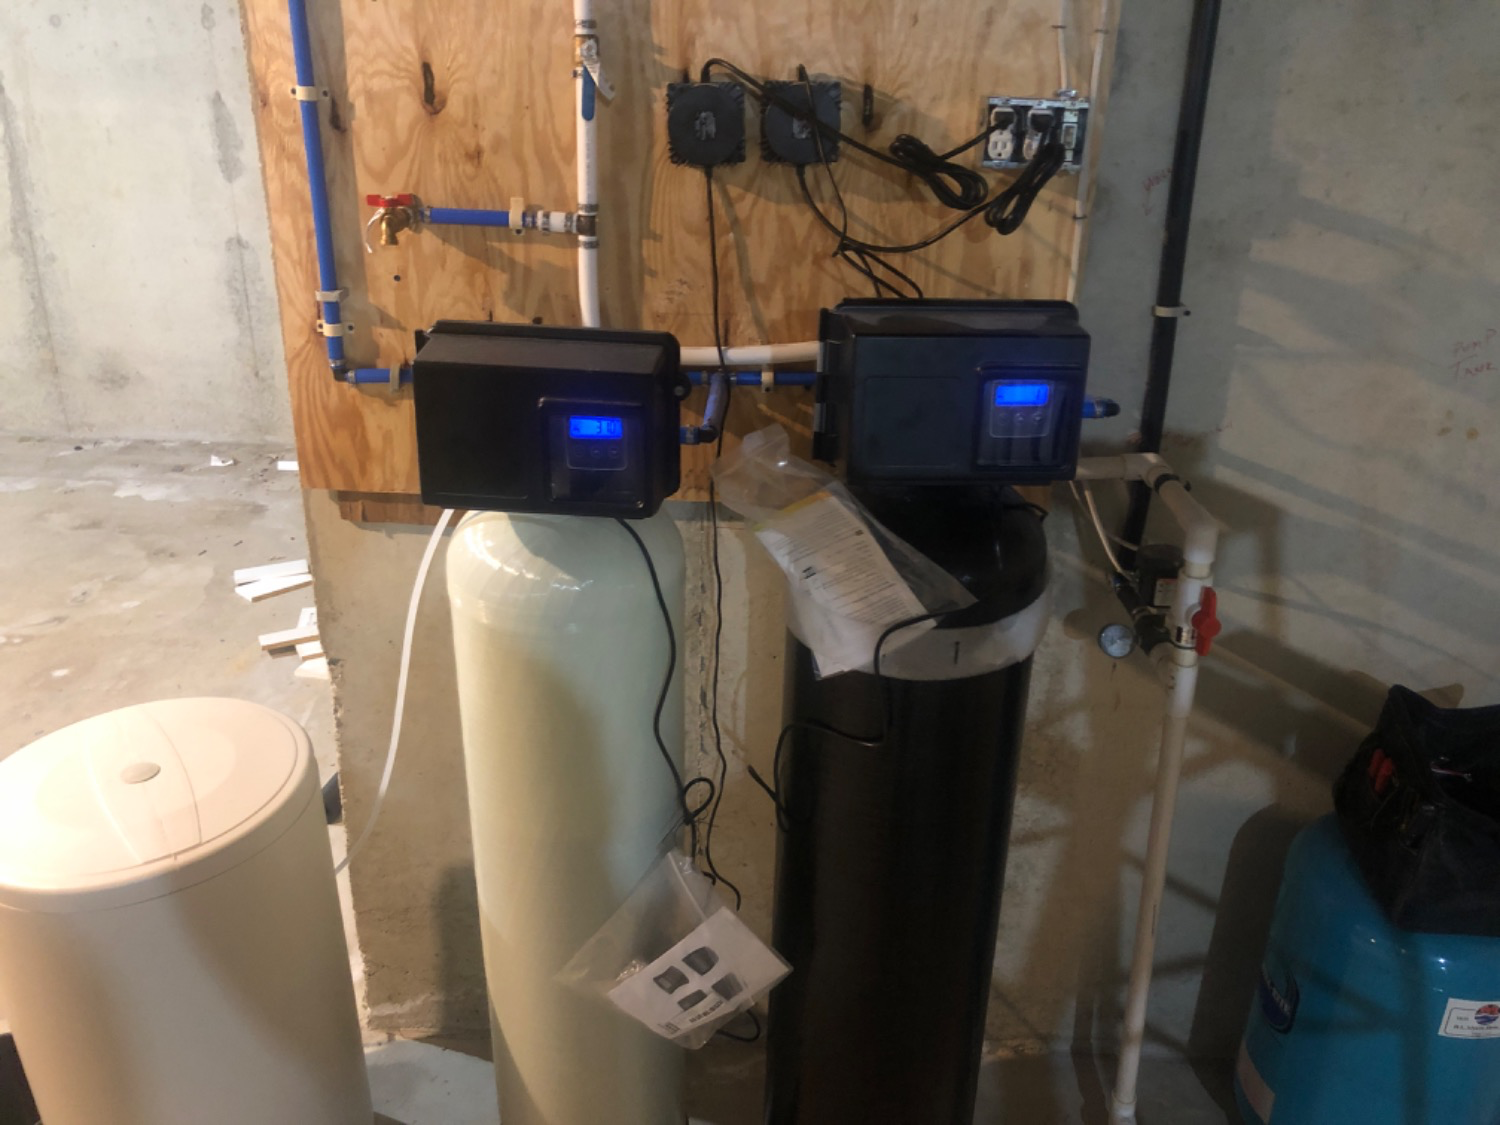
Water Softener
Difficulty: Moderate to Advanced • Time: 3 to 4 hours • Drain needed: Yes • Electric needed: Yes (120V)
Water softeners are the most involved single-system install because they have an extra component: the brine tank (the shorter, wider tank that holds salt). The resin tank and brine tank work together. During regeneration, the softener draws salt water from the brine tank to recharge the resin, then flushes the brine to the drain.
Position both tanks
Place the resin tank and brine tank side by side. The brine tank needs to be close enough for the brine line (included) to reach the valve head. Leave space to access the brine tank for adding salt.
Connect the plumbing
Fleck softeners (5600SXT, 2510SXT) use stainless steel bypass valves with 1-inch connections. Same process as above: IN from your plumbing, OUT to the house.
Connect the brine line
A brine line (included) connects the valve head to the brine tank. Push-fit on both ends. Make sure the float valve in the brine tank is set correctly (the manual specifies the right height for your model).
Run the drain line
The softener needs a drain for regeneration discharge. Same options as other backwashing systems: floor drain, laundry tub, standpipe, or sump.
Add salt and program
Fill the brine tank about 2/3 full with salt, then add water to about 6 inches above the salt level. Plug in the transformer. Set the time of day, hardness level (in grains per gallon), and regeneration schedule. The Fleck valves are metered, meaning they track water usage and regenerate only when needed.
For the full guide to choosing the right softener, read our complete water softener guide. Pricing starts at $1,695 for the 2510SXT 48K. Full breakdown at water softener cost guide.
UV Disinfection System
Difficulty: Easy to Moderate • Time: 1 to 2 hours • Drain needed: No • Electric needed: Yes (dedicated outlet)
UV systems kill bacteria, viruses, and other microorganisms by exposing water to ultraviolet light. They install inline, after all other treatment systems and before the water reaches your fixtures.
Mount the UV chamber
Mount vertically with the inlet at the bottom. Wall-mount brackets are included. Position it after your last treatment tank so the UV light treats already-filtered water.
Connect inlet and outlet
The VH200 and VH410 have 3/4-inch or 1-inch connections (model dependent). Connect inline between your last treatment tank and the house plumbing.
Plug in and verify
Plug the UV unit into a dedicated outlet. The indicator light confirms the lamp is operating. UV bulbs last approximately 12 months and are user-replaceable.
UV must go last in the treatment chain. If you put it before an iron filter or sediment filter, iron and sediment will coat the quartz sleeve and block the UV light. Read our complete UV guide and best UV system picks. The VH200 starts at $895.
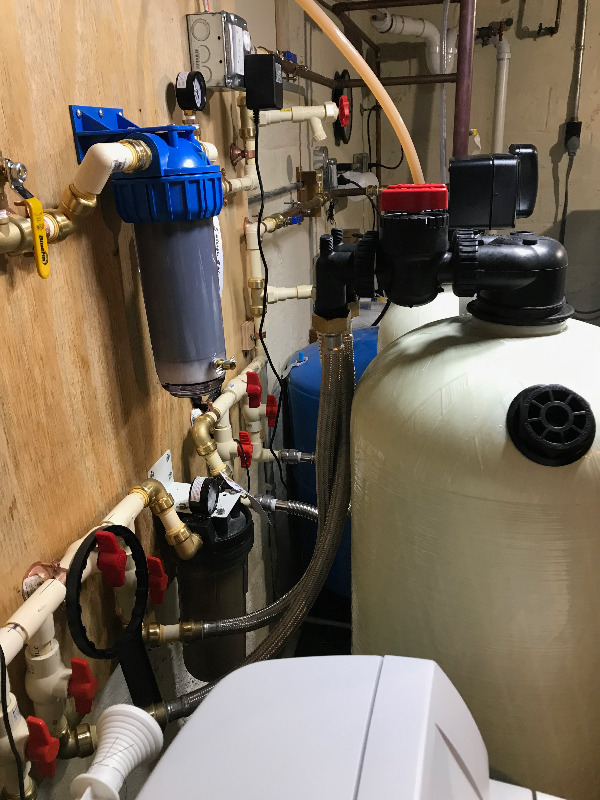
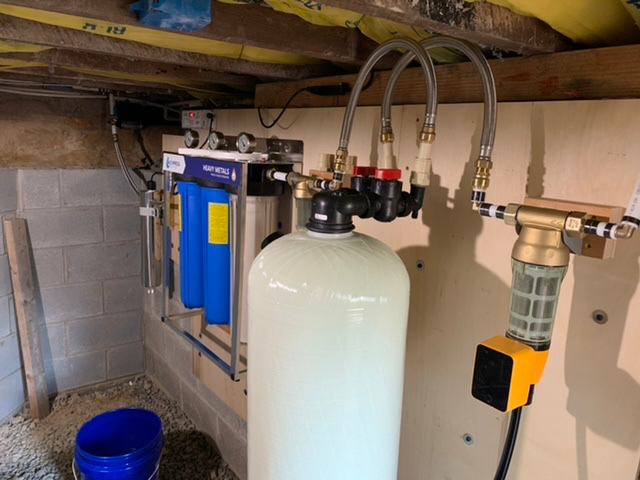
Multi-System Installations: The Correct Order
Many well water homes need more than one treatment system. The order matters. Each system is designed to handle a specific contaminant, and putting them in the wrong sequence reduces effectiveness or damages downstream equipment. Our treatment order guide explains exactly why each position matters and what happens when systems are installed out of sequence.
Here is the correct treatment sequence from the well to the house:
Pressure Tank
Pre-Filter
Neutralizer
Filter
Filter
Softener
System
Why this order?
- Sediment filter first (optional): Catches large particles before they reach your treatment tanks. Protects the valve heads and media.
- Acid neutralizer second: Raises pH before water reaches the iron filter. Iron filters work best at pH 7 or higher. Acidic water also corrodes other equipment downstream.
- Iron filter third: Removes iron and manganese. Must go before the softener because iron fouls softener resin.
- Carbon filter fourth: Removes taste, odor, chlorine, and organics. Goes after iron removal because iron clogs carbon media.
- Water softener fifth: Removes hardness. Works best with clean, iron-free, pH-neutral water.
- UV system last: Kills bacteria and viruses in already-clean, clear water. Sediment and iron block UV light, so it must go after all other filtration.
You May Not Need All of These
Most homes need two or three systems, not all six. Your water test results determine which systems you need. If you are not sure, send your water test to Aidan at 800-460-5810 and he will tell you exactly what you need and in what order. See our guide to reading water test results for help understanding your report.
Connecting multiple systems in series
Each tank has its own bypass valve with IN and OUT. You simply pipe the OUT of the first system to the IN of the second system, and so on. Use the same pipe material throughout. Leave enough space between tanks to access the valve heads (12 inches minimum).
A homeowner in Virginia who called us recently described leaving space between his acid neutralizer and water softener to add an iron filter later. That is smart planning. Leave room for future expansion if your water test shows borderline levels of anything.
Drain Line Routing for Backwashing Systems
Every backwashing system (iron filter, water softener, backwashing acid neutralizer, backwashing carbon filter) needs a drain line for the cleaning cycle discharge. This is the step that intimidates most DIYers, but it is simpler than it looks.
Drain options (any of these work)
- Floor drain: The easiest option. Just route the 1/2-inch line to the drain.
- Laundry tub or utility sink: Very common. Hook the drain line over the edge.
- Washing machine standpipe: Tap into the existing 2-inch standpipe with a Y-fitting.
- Direct connection to a waste line: Tap into a vertical PVC waste pipe in the basement.
- Sump pump: Works but check your sump capacity. Backwash cycles discharge 40 to 80 gallons depending on the system.
- Outside discharge: Only in warm climates where the line will not freeze.
How far can you run the drain line?
We have run drain lines 30 to 40 feet across basements, up walls, and over ceilings. Use 1/2-inch tubing (ID) secured with clamps every 4 to 6 feet. The backwash pushes water under enough pressure to move it through long horizontal runs. Avoid running the line uphill more than 8 to 10 feet though, as the valve head does not have enough pressure for steep climbs.
Drain Line Tip
The drain connection on the back of most Fleck valve heads is a 1/2-inch barb fitting. Push the drain tubing onto the barb and secure it with a hose clamp. At the discharge end, you need an air gap (a small space between the end of the drain line and the drain or tub) to prevent backflow. Do not submerge the drain line end in standing water.
If you have multiple backwashing systems, each one gets its own drain line. You can route them to the same drain, but stagger the backwash times so they do not run simultaneously. Set one for 2:00 AM and the next for 4:00 AM, for example.
Electrical Requirements
Backwashing systems and UV units need electricity. The requirements are minimal.
| System | Outlet Needed | Power Draw | Notes |
|---|---|---|---|
| Sediment filter | None | 0W | No electrical components |
| Non-BW acid neutralizer | None | 0W | No electrical components |
| Backwashing acid neutralizer | Standard 120V | ~5W (transformer) | Keeps the clock and runs the motor during backwash |
| Iron filter (AIO) | Standard 120V | ~5W (transformer) | Same as above |
| Carbon filter (BW) | Standard 120V | ~5W (transformer) | Same as above |
| Water softener | Standard 120V | ~5W (transformer) | Same as above |
| UV system | Standard 120V (dedicated) | 40-90W | Runs continuously. Dedicated outlet recommended |
The valve head transformers for backwashing systems plug into a standard outlet and draw very little power. You do not need a dedicated circuit. However, the outlet should not be controlled by a switch (someone flipping the wrong switch resets the valve timer). UV systems draw more power and should have a dedicated, always-on outlet.
System Startup Procedures
Once everything is plumbed and connected, here is how to bring each system online safely.
Universal startup steps (all systems)
- Double-check all connections. Walk every joint with a flashlight.
- Make sure the bypass is in the bypass position first (water skips the tank).
- Slowly open the main water supply. Let the house re-pressurize. Check for leaks at every new connection.
- Once there are no leaks, open a cold water faucet in the house.
- Switch the bypass to service position (water flows through the tank).
- Open the water supply valve slowly (1/4 turn at a time) to let the tank fill gradually. Rushing this step can shift the media bed.
- Let water run from the faucet for 10 to 15 minutes to flush fine media dust.
Additional steps by system type
- Iron filter (AIO): After flushing, initiate a manual backwash cycle to purge air from the tank and settle the media. Check the drain line for flow and leaks during the cycle. Then set the time of day and backwash schedule.
- Water softener: After flushing, initiate a manual regeneration cycle. This draws brine into the resin tank and purges air. Confirm the brine draw is working (water level in the brine tank should drop during the cycle). Set the time, hardness, and regeneration parameters.
- Backwashing acid neutralizer or carbon filter: After flushing, run one manual backwash cycle to rinse the media bed and check the drain. Set the backwash schedule.
- UV system: Make sure the UV lamp indicator light is on. Run water through for several minutes before using it for drinking.
Slow and Steady
The number one startup mistake is opening the water valve too fast. A sudden rush of water into an empty tank can shift the media bed and create channels. Open the valve 1/4 turn, wait 30 seconds, then another 1/4 turn. It takes patience but prevents problems.
Testing After Installation
After your system has been running for 3 to 5 days, test your water to confirm it is working correctly.
- Acid neutralizer: Test pH. You should see pH between 7.0 and 8.0 (up from whatever your raw water was). Home test kits from Lowe's or Home Depot work fine for pH.
- Iron filter: Test iron and manganese levels. You should see near-zero iron at the kitchen faucet. Give it a few days of normal use before testing.
- Water softener: Test hardness. Should read 0 to 1 GPG at the faucet. If hardness is still high, check your programming (hardness setting, regeneration schedule).
- UV system: Get a bacteria test (coliform + E. coli) done by a lab. This confirms the UV is eliminating microorganisms.
- Carbon filter: Taste test is usually sufficient. If you were treating chlorine, you should notice the difference immediately.
If your test results are off, call Aidan at 800-460-5810. It is almost always a programming or installation issue, not a defective system. The most common causes: bypass still partially open, inlet/outlet reversed, or the valve head needs a cycle to settle the media bed.
For a thorough understanding of what your test numbers mean, see our guide to reading well water test results. Once your systems are confirmed working, follow our complete maintenance guide for ongoing care schedules and replacement part information.
When to Call a Professional
I am going to be honest about this because it matters more than a sale. Some installs are better left to a plumber.
| Situation | Recommendation |
|---|---|
| Single non-backwashing tank (acid neutralizer, carbon filter, sediment filter) | DIY. Almost anyone can do this. |
| Single backwashing system, drain nearby, some plumbing experience | DIY. Straightforward with planning. |
| Multiple systems, comfortable with plumbing | DIY with phone support. Call Aidan during the install. |
| Any system, no plumbing experience, not comfortable cutting pipe | Hire a plumber. No shame in this at all. |
| Multiple backwashing systems, no drain nearby, complicated layout | Hire a plumber. The plumbing routing is where it gets tricky. |
| Extremely old or corroded plumbing (galvanized steel, lead, or pipes that crumble when touched) | Hire a plumber. The treatment system install is easy; the existing plumbing is the problem. |
Here is the cost math: a local water treatment company typically charges $800 to $1,500 for installation on top of the equipment cost (and they mark up the equipment). A regular plumber charges $200 to $500 for a standard water treatment install. Customers who buy from MAW and hire their own plumber save $500 to $1,500 on average. For a full price breakdown of every system, see our well water treatment system cost guide.
Tell Your Plumber to Call Aidan
If you hire a plumber, tell them to call 800-460-5810 if they have any questions about the system during the install. We are available seven days a week. Aidan has walked hundreds of plumbers through these installations. The equipment is the same as what they would get from a water treatment company; they just may not have seen this specific brand before.
Common Installation Mistakes (and How to Avoid Them)
After thousands of customer installs and 28 years of doing it professionally, these are the mistakes that come up over and over. Every one of them is avoidable.
| Mistake | What Happens | How to Avoid It |
|---|---|---|
| Inlet and outlet reversed | System does not treat water correctly. For upflow neutralizers, water bypasses the media entirely. | Follow the IN/OUT arrows on the valve head. Double-check before pressurizing. |
| Opening the water valve too fast | Media bed shifts, creating channels. Water passes through without proper contact time. | Open 1/4 turn at a time. Let the tank fill slowly. |
| Overtightening plastic fittings | Cracks the bypass valve or adapter. Causes a leak that is hard to fix. | Hand-tight plus 1/4 turn with pliers. If it leaks, add Teflon tape, not more torque. |
| Forgetting to set the bypass to service position | System is installed but water is bypassing it. "It's not working" calls. | After startup, confirm the bypass is fully in service mode. |
| Drain line submerged in standing water | Backflow contaminates the treatment tank. Bacteria growth. | Maintain an air gap at the discharge end. Never submerge the drain line. |
| Not flushing after installation | Calcite dust or carbon fines come out of faucets for days. Looks alarming but is harmless. | Run a cold water faucet for 10 to 15 minutes after startup. Run a backwash cycle for BW systems. |
| Putting the iron filter before the acid neutralizer | Iron filter underperforms because pH is too low for oxidation. | Always raise pH first, then remove iron. Follow the treatment sequence diagram above. |
| Plugging the transformer into a switched outlet | Someone flips the switch, the valve loses power, the timer resets, backwash runs at the wrong time. | Use an always-on outlet. Label it if needed. |
What Customers Say About Installing
These are verified reviews from customers who installed MAW systems themselves.
"Straight forward installation. In, out, and the drain. Ran a back wash cycle then put it online and it works GREAT! I am on a well with mildly acidic water around 6.5 with ferrous iron in it so this was the perfect solution for me. Cleaned out the iron and raised the ph to 7.5."
"Easy, bullet-proof installation. No moving parts and it does exactly what it's supposed to do. The hardest part is getting the Calcite into the tank. Raised my PH from 6.8 to a perfect 7.6! I had also previously installed the same item in my daughter's water system."
"The whole process from start to finish was great. I got a lot of online and immediate tech-support from Aiden. The only question is that some of the directions that came with it were not intuitively obvious, which caused me to have more contact and request more support."
"Fast delivery, easy installation, and Northern Virginia acidic water problem resolved. I recommend watching Mid Atlantic's YouTube video on installing these neutralizers. I used 18 inch flexible SharkBite fittings to connect to the recommended CPVC fittings. This reduced stress on the plastic Clack connection."
Frequently Asked Questions
Can I install a whole house water filter myself?
Yes. Most MAW water treatment systems are designed for homeowner installation. Non-backwashing systems (sediment filters, upflow acid neutralizers) are the easiest and require only basic plumbing skills. Backwashing systems are moderately more involved because they need a drain line and electrical connection. If you can replace a faucet or connect a washing machine, you can install most of these systems. Call Aidan at 800-460-5810 for free tech support during your install.
Do I need a plumber to install a water filtration system?
Not necessarily. Thousands of MAW customers install these systems themselves. However, if you have no plumbing experience, multiple systems to install, or difficult-to-access plumbing, hiring a plumber is a smart decision. Any licensed plumber can do the job. The plumbing is standard residential work. Customers who buy from MAW and hire their own plumber typically save $500 to $1,500 compared to going through a local water treatment company.
How long does it take to install a whole house water filter?
A single non-backwashing system takes 1.5 to 2.5 hours. A single backwashing system takes 2 to 3 hours. A water softener takes 3 to 4 hours. Multi-system installations take 4 to 6 hours. These times assume you have all materials on hand before you start.
What pipe should I use for installation?
CPVC with Oatey one-step solvent cement is the cheapest option. PEX with SharkBite push-fit connectors is the easiest. Both work great and are used by thousands of our customers. You can also use copper, but it requires soldering skill and costs more. SharkBite fittings let you transition between any pipe type (copper to PEX, CPVC to copper, etc.) without specialized tools.
What order should I install multiple water treatment systems?
The correct order from the well to the house is: sediment pre-filter, acid neutralizer, iron filter, carbon filter, water softener, UV system. Each system is designed to treat a specific contaminant, and the sequence ensures each one receives water in the condition it needs to work properly. See the treatment sequence diagram above for a visual reference.
Where does the backwash drain line go?
Any of these: floor drain, laundry tub, washing machine standpipe, sump pump, direct connection to a waste pipe, or outdoor discharge (warm climates only). The drain line is 1/2-inch tubing and can run 30 to 40 feet if needed. Maintain an air gap at the discharge end to prevent backflow.
Do I need to add gravel to the bottom of the tank?
No. MAW systems use Vortech tanks with a built-in distributor plate at the bottom. This plate replaces the old-style gravel underbed that other brands still use. The Vortech design provides better flow distribution and eliminates the hassle of loading gravel. Just pour in the treatment media and you are ready to go.
What size connections do MAW systems have?
All MAW systems have 1-inch male threaded connections on the bypass valve. If your home plumbing is 3/4-inch (which is most common), use a 1-inch to 3/4-inch reducing bushing or adapter. These are standard fittings available at any hardware store.
Can I get help during my installation?
Absolutely. Call Aidan at 800-460-5810 any time during your install. He is available seven days a week and has walked thousands of homeowners through the process in real time. This is free and unlimited. There is no charge for tech support before, during, or after installation.
What if I install the system incorrectly?
The most common installation error is reversing the inlet and outlet. This does not damage the system. You just need to swap the connections. If something is not working right after installation, call Aidan. It is almost always a simple fix: bypass not fully open, connections reversed, or the valve head needs a manual cycle to settle.